Add MFA to a Prototype App Without Breaking Logins
Add MFA to a prototype app with minimal risk: pick TOTP or passkeys, set up recovery codes, and roll out in phases with clear fallback paths.
Why MFA breaks prototype logins so often
Adding MFA to a prototype app isn’t “one extra screen.” It changes the rules for who can get in, what happens when something goes wrong, and how many edge cases your login flow must handle.
Prototype codebases often have fragile auth: mixed sessions and tokens, an unclear source of truth for the user, and shortcuts like skipping email verification or reusing one-time codes. MFA exposes those shortcuts fast. A small mismatch (TOTP time skew, duplicated user records, or a race between “verify password” and “create session”) can lock out real users.
“Not breaking logins” means more than “the happy path works.” People still need to sign in on older devices and browsers, there needs to be a safe way back in if they lose the second factor, and your support load can’t spike with “I’m locked out” tickets.
Before changing anything, measure your baseline so you can tell if MFA helped or hurt. Track a few numbers for several days: login success rate, drop-off by step (password entered, code prompt shown, code accepted), lockout events and password reset completions, and median time to sign in.
Also decide who you’re protecting first. Forcing MFA on everyone immediately maximizes friction and support. A safer starting point is high-risk accounts like admins, billing access, and anyone who can change security settings. That gives you real-world data without turning your whole login into a fire drill.
MFA basics and where it fits in your login flow
MFA (multi-factor authentication) means proving it’s really you with two different kinds of evidence. Usually that’s a password (something you know) plus a code or device approval (something you have). The “second factor” is that extra check. “Step-up auth” means you only ask for MFA when the action is risky, like changing an email or viewing billing. “Recovery” is your escape hatch if you lose the factor.
The safest place to plug MFA into a prototype app is after the first login step succeeds. That keeps your existing password or OAuth flow intact.
Where MFA sits in the flow
For password login: the user enters email and password, you verify them, then you check whether MFA is enabled. If it is, you prompt for TOTP or a passkey confirmation before creating the full session.
For OAuth login (Google, GitHub, etc.): you complete the provider callback, match or create the user, then enforce MFA before issuing your session cookie or token.
The key idea: don’t “half log in” and hope you can recover if MFA fails. Decide exactly when the user is fully authenticated, and make MFA part of that decision.
What changes in your database
Keep MFA data separate from password data, and treat it as sensitive.
You typically need a simple enabled flag and enrollment timestamp, the chosen method (TOTP, passkey, none) and method-specific metadata, and the minimum needed material to verify future challenges (for example, an encrypted TOTP secret or passkey credential IDs). Add recovery code hashes (not plain text), plus a per-code “used” marker, and optionally a field like last_mfa_verified_at if you plan to enforce step-up rules.
What to log for troubleshooting
Good logs let you debug lockouts without leaking secrets. Log events like “MFA challenge created,” “MFA verification failed,” and “recovery code used,” plus user ID, timestamp, IP, and user agent. Don’t log TOTP codes, secrets, raw recovery codes, or full OAuth tokens.
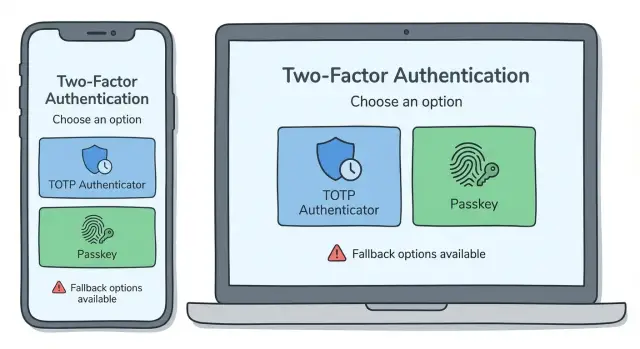
Choosing TOTP vs passkeys for a prototype app
If you’re adding MFA to a prototype, the choice is usually between TOTP (authenticator codes) and passkeys (biometric or device-based sign-in). Both can work, but they fail in different ways.
TOTP is the classic “type in a 6-digit code.” Users scan a QR code with an authenticator app, then enter a code at login. On your side, you store a shared secret per user (encrypted at rest) plus a few audit fields like when MFA was enabled and last used. Common failure modes: users lose their phone, device time is out of sync, they enroll twice and overwrite the secret, or your app accidentally allows login without actually checking the second factor.
Passkeys feel simpler. Users approve with Face ID, fingerprint, or a device PIN. You store a public key and a credential ID, not a shared secret. The failure modes shift: device dependency (no access to the device), confusing cross-device setup, or “it worked on my laptop but not my phone” if passkeys don’t sync the way the user expects.
A practical rule is simple. Choose TOTP when you need predictable cross-device access (admins, support staff, B2B tools) and can’t assume modern devices. Choose passkeys when you want the smoothest consumer login and can accept that recovery needs extra care. Support both if your users are mixed, but keep the UI focused: recommend one default (“Use passkeys on this device”) and offer the other as a clear fallback (“Use an authenticator app instead”).
Example: a two-person startup shipping an internal admin panel might pick TOTP first (it works everywhere), then add passkeys later for convenience without changing policy for admin accounts.
Enrollment flow that avoids lockouts
The biggest enrollment risk is enabling MFA too early. If you flip the “MFA enabled” flag before the user proves they can actually use it, a prototype login flow can trap them in a loop: “Enter code” but no working authenticator, a passkey prompt that never appears, or a session that gets lost.
A safe pattern is to treat enrollment like a test and only enable MFA after a successful verification. That one rule prevents most lockouts.
A lockout-proof enrollment pattern
Keep the flow linear and forgiving. Start enrollment while the user is fully signed in (fresh session). Let them set up the factor (scan a TOTP QR or create a passkey), then immediately verify once (enter a TOTP code or complete the passkey approval). Right after that, show recovery codes and require an explicit confirmation like “I saved them.” Only then mark MFA as enabled and show a clear success screen.
Good copy reduces support tickets. Be specific: “Scan this QR in Google Authenticator or 1Password. Then enter the 6-digit code to confirm. If you close this tab before confirming, MFA will not be turned on.”
Edge cases to handle upfront
TOTP often fails because of time drift. If a code is rejected, tell users to check that phone time is set to automatic, and allow a second try before forcing a restart.
Passkeys can fail when the device is missing or the prompt is blocked. Offer a backup path during enrollment: “Can’t use a passkey right now? Use an authenticator app instead.” Make sure recovery codes work even if the passkey device is lost.
Recovery codes: setup, storage, and regeneration
Recovery codes are the “break glass” option when MFA fails: phone lost, authenticator app wiped, or passkey not available. They’re spare keys, not an everyday login method. Show them right after successful MFA enrollment, and make it clear this is the one moment to save them.
Keep the set small enough that people will actually store it. Ten single-use codes is a common sweet spot for a prototype because it covers a few bad days without turning into a long list users ignore. Use plain language like “Save these now. You will not be able to view them again.” Offer copy and download, but require a strong re-check (password or current MFA) before showing or regenerating codes.
The biggest mistake is storing recovery codes in plain text. Store only hashed versions (like passwords) and keep a clear used vs unused record so each code works once and then burns.
A safe storage model is straightforward: generate 8-10 random codes, store each code as a hash plus a used_at timestamp (null until used), rate-limit attempts and temporarily lock the recovery form after repeated failures, and log recovery-code use as a security event.
Regeneration should be strict. When a user generates new recovery codes, invalidate all old ones immediately, even unused ones. Warn them clearly: “Your previous recovery codes will stop working now.” For extra safety, allow regeneration only after a strong check (current MFA or a recent verified login), so someone with a stolen password can’t quietly replace the codes.
Roll out MFA in phases with clear fallback paths
Trying to enforce MFA in one big switch usually creates a wave of lockouts. A phased rollout lowers risk and shows you where real users get stuck.
A phase plan that fits most small apps:
- Opt-in: prompt users to enable MFA after login, with a clear skip option.
- Required for admins and staff: protect the highest risk accounts first.
- Required for everyone: only after enrollment and recovery are boring and stable.
- Step-up only: use MFA only for risky actions (change email, export data, view billing), even if login stays password-only.
Each phase needs a safe fallback, or support gets flooded. Aim for at least two ways back in: a self-serve option and a human option.
Fallback paths that prevent lockouts
Plan these before enforcing anything. Recovery codes are the minimum. A backup factor helps too (TOTP plus a passkey, or two passkeys). If you offer support-assisted resets, define clear identity checks and a cooldown before MFA is removed. A short grace period after enrollment can reduce false lockouts, but keep it tightly scoped (for example, “skip once”) so it doesn’t become a permanent bypass.
Feature flags and communication
Use a feature flag to roll out to internal accounts first, then small cohorts (5%, 20%, 50%). Watch enrollment completion rate, MFA challenge failure rate, and “can’t access account” tickets.
Tell users what’s changing and what to do if they lose access. A short in-app message beats a long announcement: “You’ll be asked for an extra code next week. Save your recovery codes now.”
Make resets and account changes MFA-safe
The easiest way to defeat MFA is to sneak around it through account changes. Treat resets and profile edits as security events, not simple form updates.
Password reset should not disable MFA
Password resets are attacker-friendly because inboxes get compromised. After a successful reset, keep MFA turned on and require a step-up check on the next login. If you allow resetting MFA, make it a separate action that requires an MFA challenge (or a recovery code) after the new password is set.
A good rule: changing the password can help someone regain access, but it shouldn’t grant the power to remove MFA.
Protect high-risk account changes with step-up checks
Some changes should always require “prove it’s really you,” such as email changes, new device enrollment, MFA method removal or replacement, phone number changes (if you use SMS as a backup), and payout or billing detail updates.
If a user updates their email, send a confirmation to the old email and keep the old email active until confirmed. If the old email isn’t accessible, require recovery codes and a short support review.
Sessions, remembered devices, and tokens
“Remember this device” is fine, but keep it bounded. Set clear time limits (often 14-30 days), require re-auth for risky actions even on remembered devices, and make revocation predictable: global sign-out after password change, recheck or revoke sessions when MFA is enabled or replaced, and a simple “active sessions” list with a revoke button.
For API tokens and integrations, decide whether they’re tied to a user session (then MFA should gate creation and scope changes) or long-lived keys (then rely on tight scopes, expirations, and rotation rather than forcing MFA on every call).
Common mistakes that cause lockouts and support fires
Most MFA problems aren’t about the math. They happen because the “what if I can’t sign in?” paths were never finished.
Mistake 1: Enabling MFA before recovery is real
Teams ship the MFA prompt but leave recovery codes untested, unfindable, or broken on mobile. The result is instant lockouts.
Before flipping any switch, test recovery end to end with a fresh account and a “lost phone” scenario: generate codes, use one, regenerate, and confirm old codes stop working.
Mistake 2: Treating secrets like normal data
TOTP seeds and recovery codes aren’t like a username. If they’re stored in plain text, copied into logs, or displayed again later, one leak turns into account takeovers.
Store only what you must, protect it like a password, and never display recovery codes again after setup. If users need them, they should regenerate them.
Mistake 3: “Support can just bypass it”
A manual MFA bypass feels helpful until it becomes the easiest path into accounts. If you need a bypass, make it time-limited, require verification steps, and leave an audit trail you can review.
Mistake 4: Weak TOTP handling
TOTP failures often come from clock drift, reuse, and missing rate limits. Accepting the same code twice, or accepting too wide a time window, makes brute force and replay easier.
Keep it simple: allow a small time window but block code reuse within that window, rate limit attempts, use temporary lockouts (not permanent bricks), and show clear errors for “wrong” versus “expired.”
Mistake 5: Assuming passkeys behave the same everywhere
Passkeys can fail in surprising ways: device changes, browser support differences, or users who don’t have a synced credential. If your app requires passkeys but offers no backup, you’ll lock out real people.
Keep a clear fallback (TOTP or recovery codes) and test on at least one iOS device, one Android device, and a desktop browser.
Quick checklist before you ship MFA
One boring habit saves you later: make sure you can see what’s happening and undo it fast.
Pre-launch checks (so you can recover fast)
Confirm you can roll back the MFA change (feature flag, config switch, or a quick deploy). Turn on audit logs for key events like enroll, verify, fail, lockout, recovery-code use, and disable. Back up the user table (and any MFA-related tables) and practice restoring to a safe copy. Verify error tracking captures auth errors with enough detail to debug without logging secrets or codes. Test session revocation so that when MFA settings change, old sessions are rechecked or signed out.
Then test user journeys end to end. Don’t stop at “code accepted.” Follow the full path to the first screen after login.
User journeys and security checks
Act out a small set of scenarios:
- A new user enrolls MFA, then signs in on a second device.
- An existing user enables MFA, logs out, then logs back in with remembered device on and off.
- Lost phone: a recovery code works once, then the user regenerates codes and re-enrolls.
- Email change and password reset flows require MFA (or a safe step-up) before taking effect.
- Abuse resistance: rate limits on password attempts and MFA code attempts, plus temporary lockouts that don’t brick the account.
Prepare for the first support ticket with a short script: what to ask, what to verify in logs, and when to escalate.
Example rollout for a simple prototype app
Picture a small SaaS prototype: users sign in with email and password, and there’s an admin area for billing, user management, and support tools. You want better security, but you can’t risk locking people out.
Start by protecting the highest-risk accounts first (admins), then expand to everyone once the flow feels boring and reliable.
Phase 1: Optional TOTP for admins
Enable TOTP only for admin accounts, and keep it optional at first. Put the prompt in admin settings, not in the middle of a rushed login.
A simple setup looks like this: the admin enrolls TOTP, the app shows recovery codes once, the admin confirms one TOTP code, and the next login asks for password plus TOTP. If TOTP fails, a recovery code gets them in.
Make sure there’s always a way back. If an admin can’t complete MFA, they should still be able to sign in with password and contact support (temporarily) instead of getting hard-blocked.
Phase 2: Passkeys for regular users, TOTP as backup
Once admins are stable, offer passkeys to regular users as the easiest option. Keep TOTP available as a backup for people who can’t use passkeys yet (older devices, shared computers).
Roll out gently: start by offering “Add a passkey” after login, then later make MFA the default for new signups.
A real failure, handled cleanly
A user loses their phone and can’t access TOTP. They sign in with email and password, choose “Use a recovery code,” and get in. Right after, you prompt them to enroll a new passkey (or new TOTP) and regenerate recovery codes. Remove the old MFA method only after the new one is confirmed.
Next steps and when to get help
If you want MFA without broken logins, start with a short plan your team can share: who gets MFA first, how someone signs in if MFA fails, and what success looks like (fewer risky logins, not more support tickets).
Run a small internal rollout using real accounts, real devices, and real conditions (new phone, lost phone, time drift, browser privacy mode). Keep the pilot small enough that you can watch every failure and fix it quickly.
Decide a few things in writing before you flip any switch: phase 1 scope, fallback options, what you log and review, who can reset or override and what proof they need, and when enforcement starts (plus how users will be warned). After rollout, watch friction early. Spikes in “invalid code” errors often point to time drift, confusing copy, or users enrolling the wrong device. Spikes in recovery-code use can mean passkey or TOTP enrollment isn’t sticking.
Get help when you see repeated lockouts, unclear ownership of reset workflows, or signs that your auth code is fragile (hard-coded secrets, inconsistent sessions, or odd bypasses). If you inherited an AI-generated prototype, FixMyMess (fixmymess.ai) can run a free code audit to identify the lockout risks and the specific places your current auth flow can bypass or break MFA before you enforce it for everyone.
FAQ
Where should MFA go in my login flow so I don’t break auth?
Put MFA after the first step (password or OAuth) succeeds, but before you create the full session cookie/token. Treat “fully logged in” as a single moment that includes MFA, so you don’t end up with half-authenticated sessions that are hard to unwind when MFA fails.
What metrics should I measure before and after adding MFA?
Start by tracking login success rate, drop-off by step (password entered, code prompt shown, code accepted), lockout events, password reset completions, and median time to sign in. If those numbers get worse right after rollout, you’ll know it’s friction or failures, not “users hate security.”
Who should get MFA first in a prototype app?
Don’t force it on everyone first. Require it for high-risk accounts like admins, billing access, and anyone who can change security settings, then expand once enrollment and recovery are stable and support tickets stay low.
Should I use TOTP or passkeys for a prototype?
Choose TOTP if you need predictable access across older devices and mixed environments, especially for admins and B2B teams. Choose passkeys if you want the smoothest sign-in on modern devices and can invest in solid recovery, because device changes and sync confusion are the common failure points.
How do I avoid locking users out during MFA enrollment?
Only mark MFA as enabled after the user successfully completes a verification during enrollment. If you flip the “enabled” flag before they prove it works, you can trap them in a loop where they’re required to pass MFA but don’t have a working factor set up.
How should I store and manage recovery codes safely?
Show recovery codes immediately after a successful MFA setup and make it clear they can’t be viewed again. Store only hashed recovery codes (not plain text), mark each code as used once redeemed, and invalidate all old codes when the user regenerates a new set.
What’s the safest way to roll out MFA without a support meltdown?
A phased rollout is safer: optional opt-in, then required for admins/staff, then required for everyone once it’s boring and reliable. Make sure there are at least two ways back in, like recovery codes plus a backup factor or a support-assisted reset with strict identity checks and a cooldown.
Should a password reset disable MFA?
Don’t let password reset remove MFA automatically. After a reset, keep MFA on and require it on the next login, and treat “remove/replace MFA” as a separate high-risk action that needs MFA or a recovery code.
What should I log to debug MFA issues without leaking secrets?
Log security events like challenge created, verification failed, recovery code used, and MFA disabled, along with user ID, timestamp, IP, and user agent. Never log TOTP codes, secrets, raw recovery codes, or full OAuth tokens, because logs tend to spread widely during debugging.
When should I get help fixing MFA in an AI-generated prototype?
Repeated lockouts usually mean fragile auth logic, mixed session/token handling, or unfinished recovery paths. If you inherited an AI-generated prototype and the auth flow is inconsistent, FixMyMess can run a free code audit to pinpoint where MFA can bypass, break, or brick accounts and help you stabilize it fast.