Sandbox mode for demos: seed a tenant and block real emails
Learn how to add a sandbox mode for demos by seeding a demo tenant and blocking real emails, payments, and webhooks so you can present safely.
What can go wrong when you demo on a live system
A live demo feels fast because everything is already set up. It’s also where small clicks can turn into real actions: real emails, real charges, and real data changes.
The most common surprise is messaging. A demo user updates a profile, invites a teammate, or triggers a password reset and your app happily emails a real address. If your demo account is using production settings, even a “test” can notify actual customers, spam a mailing list, or leak private details in a template.
Payments can be worse. It only takes one checkout flow connected to a live processor, one saved card, or one “$1 verification” step to charge money by mistake. Sometimes it doesn’t even happen during the call. A demo user clicks “upgrade,” your billing job runs later, and an account gets billed when you’ve already forgotten about it.
“Just use staging” doesn’t always solve it. Staging often shares third-party integrations (email, SMS, webhooks), and it’s commonly less locked down. Or your demo needs production-like data and speed, so teams end up demoing in production anyway.
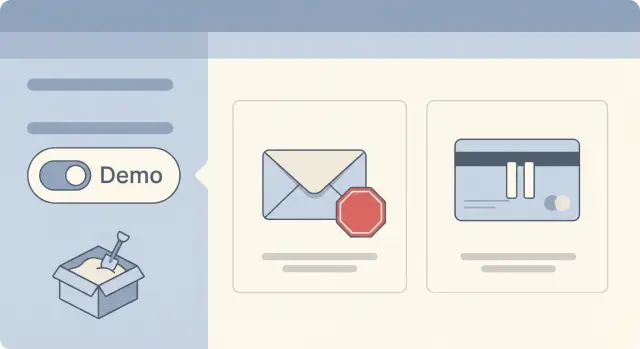
A safe demo sandbox should protect four things:
- People (no accidental emails, texts, or invites)
- Money (no real charges, refunds, invoices, or payout events)
- Data (no access to customer records, and no demo actions that modify real accounts)
- Reputation (no surprise notifications to partners via webhooks or integrations)
Picture a founder demoing to an investor. They type a real email during sign-up, click “invite teammate,” and your app sends an invite to a random person. Then they click “upgrade” and the system creates a real subscription. That’s the kind of demo story you only need once.
What “sandbox mode” actually means in plain terms
A sandbox mode for demos is a promise you make to yourself and your audience: the product should look and feel real, but it shouldn’t be able to cause real-world impact.
That promise is different from a staging environment. Staging is usually a separate copy of your app where engineers test changes. It might still send emails if someone misconfigures it, and it often has messy, half-real data. Sandbox mode is behavior your app enforces, even when the UI looks like production.
It’s also different from a simple “test account.” A test account is just another user record. If your app is wired to real email, real payments, and real integrations, that account can still trigger side effects.
Side effects are anything your demo can accidentally do outside your app. The usual suspects are outbound messages (email/SMS), payments, webhooks and integrations (CRM updates, Slack pings, automations), and data writes that create real objects (customers, orders, support tickets).
A good sandbox keeps the experience realistic by simulating outcomes. The user clicks “Invite teammate,” they see “Invite sent,” the activity log updates, but no email leaves your system. The user clicks “Upgrade,” they see a believable receipt screen and a “Plan: Pro” badge, but nothing is charged.
Decide what to fake, block, or allow in a demo
Before you build anything, take inventory of every “real world” effect your app can trigger. A good sandbox mode is less about pretty fake data and more about making sure nothing escapes your demo tenant.
Start with anything that can cause damage or confusion: emails, SMS, payments, webhooks, file uploads, and analytics. Don’t forget quieter risks like password resets, invite links, exports, and background jobs.
Then decide what must be blocked, what can be allowed, and what should be faked so it looks real. A simple rule: reads are usually safe; sends, charges, and notifications should be blocked or simulated.
A practical split for most products looks like this:
- Allow: search, filtering, dashboards, viewing reports, editing profile fields
- Fake: “send invite,” “email receipt,” “upgrade plan,” “notify team” (show success UI and log the event)
- Block: charging a card, sending real emails/SMS, calling customer webhooks, exporting real data
- Gate: destructive actions like delete, bulk updates, or admin changes (require a confirm step)
Next, define what the demo tenant can see and change. The goal is a safe playground, not an admin account that can wander into production-like settings. For example, you might allow creating projects and tasks, but disallow changing billing details, API keys, or authentication settings.
Write the rules down in one place so the team stays aligned. Keep it short and concrete:
- What the demo tenant is allowed to do
- What is always blocked (no exceptions)
- What is simulated and how it appears to the user
- Where demo activity is logged for troubleshooting
- Who can turn demo mode on or off
Example: during a sales call, someone can sign up, create a workspace, invite a teammate (fake), and click “Upgrade” to see plan features (fake), but the app never sends an email or attempts a real charge.
Step-by-step: seed a demo tenant you can reset
Start by creating a dedicated tenant just for demos. Give it an unmistakable name (like “DEMO - ACME”) and store a clear flag in the database (for example is_demo_tenant = true). That flag becomes your safety net for later rules like blocking emails and payments.
Next, seed realistic data so the product feels alive. Aim for “just enough” content: a couple of sample users, one or two projects, and a small set of items that show the core workflows. Use believable names and statuses, but never use real customer data.
Keep the seed script small and repeatable. If you can’t re-run it safely, it isn’t a seed script yet. Prefer deterministic IDs or a consistent “demo namespace” so resets don’t create duplicates.
A reset pattern that works for most apps:
- Delete all data for the demo tenant (or restore from a clean snapshot)
- Re-create the demo tenant with the demo flag
- Insert sample users and roles (admin, member, viewer)
- Insert a few realistic records (projects, messages, invoices)
- Verify key screens load without manual fixes
Make reset easy. One-click reset for internal use is ideal, and a scheduled nightly reset is a good backup. Finally, add a visible “Demo mode” indicator in the UI (top bar, header, or banner) so no one forgets where they are.
Step-by-step: add a demo mode switch that is hard to miss
A safe demo starts with one clear switch that changes how the whole app behaves. Pick one place to control it (an environment flag, a tenant setting, or a feature flag), and make everything else read from that.
1) Choose one switch and make “safe” the default
For many teams, an environment flag is the simplest: DEMO_MODE=true. If you need both real and demo tenants in the same environment, use a tenant-level setting like tenant.is_demo.
Make the default safe. Accidents usually happen when someone forgets to set a variable.
2) Centralize the checks (no scattered if-statements)
Create a single “demo guard” module that your app calls before any risky action. The guard decides: allow, block, or replace with a fake response. Every email send, payment call, webhook, and data export should go through it.
Route these through the guard first:
- Outbound messages (email, SMS, push)
- Payments and refunds
- Webhooks and third-party API calls
- File exports (CSV, invoices, reports)
- Admin actions (delete, invite, role changes)
3) Log everything you block (so you can prove it)
When the guard blocks an action, write a clear log event with what was attempted, which tenant/user did it, and why it was blocked. Example: during a demo, someone clicks “Invite teammate,” and you return “Invite queued (demo)” while logging blocked_email_send. If a stakeholder asks “Did anything go out?”, you have an answer.
4) Make bypassing it hard
Add a loud UI banner like “DEMO MODE” and include it in server logs at startup. Also add a test that fails if demo mode is off in a demo environment.
Step-by-step: prevent real emails, SMS, and webhooks
The fastest way a demo goes wrong is when your app talks to real people or real systems. In sandbox mode, treat every outbound message as unsafe by default, then allow only what you can fully control.
1) Stop outbound email from leaving your system
Start with email because it’s usually wired into sign-up, invites, password resets, and receipts.
- Route all outbound email to a sink mailbox, or disable sending completely in demo
- Replace every recipient address with a safe test address (even if the user typed their own)
- Add an in-app banner like “Email suppressed in demo” so people aren’t confused
- Log the email content in the UI (subject and a preview) so the demo still feels real
- Prevent background retries so a suppressed email doesn’t queue forever
Example: during a demo, someone invites [email protected]. Your app should swap it to a safe address (like [email protected]), then show a toast: “Invite email suppressed in demo. View message.” That keeps the story moving without contacting a real client.
2) Block SMS, push, webhooks, and background jobs the same way
Use the same rule for SMS and push notifications: never send to a real device in demo. For webhooks, pause delivery or stub it and show what would have been sent.
If you have background jobs (welcome sequences, billing retries, CRM sync), prevent them from running for demo tenants, or force them into a safe no-op path.
Step-by-step: make payments look real but stay safe
Payment is where demos get risky fast. A good sandbox mode makes checkout feel real, but guarantees no real money moves, even if someone clicks every button.
1) Use the provider’s test setup by default
Wire your app to your payment provider’s test environment with test keys. Keep those keys separate from production and load them from environment settings so you can’t “accidentally” ship live keys into a demo build.
If you can have both real and demo tenants in the same environment, a tenant-level flag like is_demo_tenant is more reliable than a single global setting.
2) Hard-block any real charge in demo tenants
Even with test keys, add a second safety net: when is_demo_tenant is true, don’t call capture/charge at all. Return a controlled response from your backend instead.
A simple flow looks like this:
- User clicks “Pay” or “Upgrade”
- Backend detects demo tenant and skips the provider call
- Backend stores a fake transaction record (status, amount, currency)
- UI receives a realistic “success” result and shows a receipt screen
- Admin pages show the same fake payment consistently
3) Keep subscriptions, refunds, and invoices consistent
Demos fall apart when one screen says “Subscribed” but the invoice list is empty. Pick one set of fake states and reuse them everywhere: subscription start date, next billing date, invoice IDs, and refund status.
Example: a viewer “upgrades” to Pro during the demo. You generate INV-DEMO-1042, mark it paid, and set renewal in 30 days. If they click “Refund,” flip the same records to refunded and show a matching credit note.
4) Ignore payment webhooks in demo mode
Webhooks can override your fake state. When a webhook arrives, check the tenant (or metadata) and drop it if it targets a demo tenant. Log it so you can prove the block worked.
Security and privacy basics for demo environments
A demo environment should be safe even when you’re tired, rushed, or sharing access with someone you don’t know well. The goal is simple: your demo can look real, but it can’t touch real customer data or trigger irreversible actions.
Start with hard separation. Demo accounts shouldn’t be able to see or guess real tenant IDs, real users, or real files. Keep demo data in its own database/schema and storage bucket, and block cross-tenant reads by default. If you have “admin” views, make sure demo admins only administer the demo tenant.
Lock down the actions that cause damage
Even in a demo, some buttons are too dangerous. Remove them, hide them behind a separate internal login, or make them no-ops in demo mode. Prioritize controls like exports, deletes, role/permission edits, and bulk downloads. Put limits on file uploads (type and size), and reject anything executable.
Rate limits matter more than people expect. Public demos get poked. Put tight caps on login attempts, password resets, and any endpoint that can create costs (uploads, third-party calls, SMS).
Audit logs: assume you will need to replay what happened
Record enough detail to answer: who accessed the demo, what they tried, and what the system blocked. At minimum, log the actor (user ID), tenant, IP, and user agent, plus key events like login, invite attempts, export attempts, and role-change attempts. Redact sensitive fields and store the final outcome (allowed/blocked).
If you inherited an AI-generated prototype, double-check for common leaks like exposed secrets, overly broad admin permissions, or missing tenant checks.
Common mistakes that make a demo risky
Most demo disasters happen because the app looks safe in the UI, but the system behind it still behaves like production. A button may say “Email disabled,” yet the backend still fires the real send call. Or you turn off the checkout page, but the payment webhook still triggers when someone retries an old link.
Mistakes that sink sandbox demos over and over:
- Blocking only the front end while backend endpoints still send emails, charge cards, or call third-party APIs
- Forgetting background workers, scheduled jobs, and retries (they often run with full permissions and real credentials)
- Shipping a demo build that still contains real API keys, SMTP credentials, or a production webhook secret
- Sharing one demo account with everyone, so settings drift, data gets messy, and you can’t tell what changed
- Skipping a reset plan, so the demo tenant slowly fills with junk data, broken states, and “ghost” subscriptions
A real example: you demo a “team invite” flow. The invite form is hidden in demo mode, but the API route is still live. A curious user opens dev tools, hits the endpoint directly, and your worker sends real invite emails to random addresses. Now you have privacy risk, spam risk, and a bad look.
Two habits prevent most of this. First, make safe behavior live in the backend, not just the UI. Hard-block outbound providers when demo mode is on, and log the intent instead. Second, treat reset as a feature: one action that recreates the demo tenant, re-seeds known data, and disables long-running jobs for that tenant.
Quick checklist before you share a demo
A safe demo feels boring behind the scenes. That’s good. Before you hand a demo to a prospect or hop on a call, do one fast pass that proves your demo can’t send real messages, charge real money, or leak real data.
The 5 checks that prevent most demo disasters
- Confirm you’re in the right place: the demo tenant is clearly labeled and separated from any real customer data
- Trigger the noisy paths: password reset, invite user, notifications. Verify email/SMS don’t deliver, and outbound webhooks do nothing or go to a safe endpoint
- Walk the money path: click upgrade and attempt checkout. Make sure it’s test-only (test keys) or fully faked and can’t charge a card
- Prove you can clean up: run reset, then confirm the tenant returns to the same known starting state
- Scan for accidental secrets: check environment config, server logs, and client-side code for real API keys, tokens, or private values. If a browser can see it, assume others can too
A short presenter script (when features are disabled)
Say one sentence, then move on:
- “This is a sandbox, so messages are blocked for safety.”
- “Payments are simulated, but the screens match the real flow.”
- “After the call, we reset this demo so everyone starts fresh.”
Run this checklist once per demo day. It takes minutes and prevents surprises.
Example: a safe product demo from sign-up to “upgrade”
A founder is demoing to two people on the same call: an investor and a pilot customer. The goal is to show the full journey without risking real emails, real charges, or accidental messages to real users.
The demo starts with a clean “Acme Demo” workspace that was seeded earlier. It already has realistic projects, a few tasks, and sample usage stats so screens don’t look empty. The founder signs up with a new email address anyway, just to prove onboarding works. Behind the scenes, the system routes this to a dedicated demo tenant and tags the session as sandbox mode.
Next, the audience asks to invite a teammate. The founder types a real-looking email, clicks Invite, and the UI shows “Invite sent.” Behind the scenes, the email is suppressed and stored in an audit log with a note like “blocked in demo mode.” If the pilot customer asks, “Did my teammate actually get it?”, the founder answers plainly: “No, invites are simulated in this environment so we don’t message anyone by mistake.”
Then comes the upgrade moment. The investor wants to see pricing and payment.
What the audience sees
They try three actions: sign-up, invite a teammate, and upgrade a plan. The upgrade flow accepts a test card number and shows a success screen, then the account flips to “Pro” with higher limits.
What happens behind the scenes
Payments never hit a live processor. The app creates a demo-only payment record, returns a “paid” status, and keeps that state consistent across invoices and admin pages. Webhooks are ignored for the demo tenant, and any “receipt” email is suppressed.
After the call, the team clicks a reset button (or runs a reset script) that wipes the demo tenant and re-seeds it to the known-good state.
Next steps: ship a demo that won’t surprise you
Start by choosing the right place to demo. Sandbox mode is for safety inside the same app: you keep the real UI, but block side effects (real emails, real charges, real webhooks). Staging is a separate copy of production: good for testing releases, but it can still send real emails if you forget a setting. Many teams need both: staging for release testing, and sandbox mode for customer-facing demos.
If you want the fastest path to a safer demo, roll it out in small steps:
- Block real email/SMS first (replace with a log or inbox view)
- Make payments look successful without charging cards
- Disable outbound webhooks and background jobs that talk to real systems
- Add a reset button for the demo tenant (or an automatic nightly reset)
- Only then polish seeded demo data and flows
Add guardrails that fail loudly. If someone accidentally demos on the wrong tenant, the app should refuse risky actions.
If you inherited an AI-generated codebase (Lovable, Bolt, v0, Cursor, Replit), it’s worth getting a second set of eyes on the wiring. FixMyMess (fixmymess.ai) focuses on diagnosing and repairing these kinds of side effects - things like mixed environments, exposed secrets, and integrations that still point at production - so a demo stays safe and repeatable.
FAQ
What’s the difference between “sandbox mode” and a staging environment?
A staging environment is a separate place engineers test changes, but it can still be misconfigured and send real emails or hit real integrations. Sandbox mode is app behavior that blocks or simulates risky side effects even when the UI looks like production.
Isn’t a “test account” enough for safe demos?
Yes. A test account is just another user row; if your backend still calls real email, payments, or webhooks, it can trigger real-world effects. Sandbox mode needs server-side rules that block or fake those actions.
What are the first things I should lock down before sharing a demo?
Start with anything that contacts people or moves money: invites, password resets, receipts, SMS/push, checkout, refunds, and partner webhooks. Also include “quiet” risks like exports and background jobs that run later.
How do I prevent real emails from going out during a demo?
Add a clear flag like is_demo_tenant=true and make the backend check it before any outbound action. Then route email and SMS through a single send function that can suppress delivery when the tenant is a demo.
How do I make payments look real without charging anyone?
Make the backend skip the provider call entirely for demo tenants and return a controlled “success” response instead. Store a fake transaction/subscription record so the UI, invoices, and admin screens all show consistent results without charging anything.
How do I stop background jobs from causing surprises after the demo ends?
Background workers often run with full credentials and don’t know they’re “in a demo.” Add tenant checks inside the jobs themselves, or prevent demo-tenant jobs from being enqueued so retries and delayed billing can’t fire later.
Should I just hide dangerous buttons in demo mode?
Hide in the UI helps, but it’s not enough. Treat the backend as the source of truth: enforce demo rules at the API/service layer so even direct requests can’t send emails, charge cards, or call third-party systems.
What kind of data should I seed into a demo tenant?
Use fake-but-believable data that shows core workflows, and never copy real customer records. “Just enough” is usually best: a couple of users, one or two projects, and a few items in different statuses so screens don’t look empty.
How do I reset the demo so it’s clean for every call?
Give the demo tenant a reset button or script that wipes demo data and re-seeds the same starting state. A nightly reset is a good backup, and a visible “Demo mode” banner reduces mistakes during live calls.
What if my AI-generated prototype has messy integrations and I’m not sure what’s wired to production?
Log every blocked or simulated action with who did it, what they attempted, and what the system did instead. If you inherited an AI-generated codebase and you’re not sure where side effects are wired, FixMyMess can run a free code audit and typically fix demo safety issues within 48–72 hours.