Upgrade Next.js Safely in Inherited Projects: A Practical Order
Need to upgrade Next.js safely in an inherited codebase? Use a simple upgrade order, fast regression checks, and tips to spot runtime-only breaks.
Why inherited Next.js upgrades feel risky
An inherited project usually means you got a codebase without the story behind it. The original developer is gone, the docs are thin (or missing), and the app runs because a pile of small assumptions happen to line up. You don't know which parts are solid and which parts are held together by luck.
Upgrades break more often in that situation. Dependencies may be pinned for a reason nobody wrote down. Build scripts may rely on a specific Node version. A library might be deprecated but still "working" only because nothing else has moved. When you upgrade Next.js, those hidden assumptions surface all at once.
The worst failures are runtime-only breaks: everything looks fine locally, but production falls over. Common examples:
- Auth works on localhost but fails behind a real domain because of cookies, CORS, or proxy headers.
- Builds succeed, but the server crashes at startup because an environment variable is missing.
- Pages render locally, but data fetching fails in production due to stricter network rules or timeouts.
- Errors show up only on cold starts, serverless, or edge runtimes.
- Secrets get exposed or blocked because production settings are different.
The goal isn't perfection. It's reducing risk in small steps so you always know what changed and why. Smaller diffs, smaller blast radius, and a fast path back if something goes wrong.
Success should be simple to verify: the app boots, the key flows work, and deploys stay stable. For most products, that means the homepage loads, login works, one core money action completes (checkout, booking, create-post), and errors don't spike after release.
Before you touch code: quick scoping in 20 minutes
The fastest way to make an upgrade safer is to spend 20 minutes figuring out what you're actually changing and where it can break. Most upgrade pain comes from surprises, not the version bump.
Start by confirming what the upgrade includes. Are you changing Node, Next.js, or both? Also check what your hosting and CI are actually using. It's common to see "one version in package files" and a different one in production.
Write down where the app runs today: your laptop, CI, staging, and production. A Node version that works locally can fail in CI, and a build that passes in CI can still crash at runtime on the server.
A quick scoping checklist (without reading the whole codebase):
- Current and target versions (Node and Next.js), plus the package manager (npm, pnpm, yarn).
- Where it runs (local, CI, staging, production) and who owns each.
- The top 5 user flows that must not break.
- Constraints you can't change quickly (hosting Node version, database, auth provider, edge/runtime settings).
- Upgrade scope (patch, minor, major) - choose the smallest step that meets your need.
Pick five flows you can test quickly. If you can't describe each in one sentence, you're not ready to change versions.
A common real scenario: you plan a simple Next.js bump, then discover production is pinned to an older Node version by the host. That turns one change into a two-step plan: align Node everywhere, then upgrade Next.js.
Freeze a baseline so you can compare changes
Upgrades get scary when you can't tell whether you broke something or whether it was already broken. Before you touch versions, lock in a baseline you can return to.
Write down what you have today: Node version, Next.js version, package manager, and lockfile. If the repo has an .nvmrc or a packageManager field, note it. If it doesn't, that's an early risk to fix.
Then run what exists and record what's already failing. If there are tests, run them once and save the output. If there are no tests, create a tiny repeatable demo that proves the app boots and the main flows work.
Make sure the baseline is reproducible. Do a clean install from scratch (delete node_modules, reinstall, then build and start). If a clean install fails, you just learned something important before any upgrade.
A simple "known good" demo script to keep in a note:
- Clean install dependencies.
- Build the app.
- Start the server.
- Click through 2-3 key paths (sign in, create an item, log out).
- Confirm one or two pages that use real data.
Save baseline logs too: one from build and one from start. After the upgrade, those logs are your quickest way to spot new warnings, missing env vars, or runtime-only crashes.
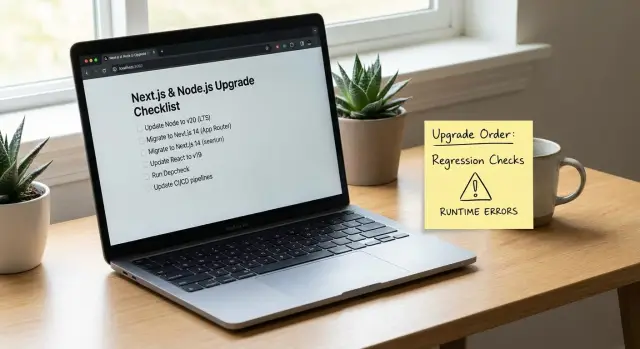
A small, safe upgrade order (Node, then Next.js)
Keep the sequence boring and predictable: upgrade Node first (to a version Next.js supports), then upgrade Next.js, then touch the rest of the dependency tree.
Choose your target Next.js version, check what Node versions it supports, then pick a Node version you can run everywhere (local machines, CI, and hosting). For most teams, that means a current LTS release, not the newest possible version.
Jumping multiple major versions at once is where inherited codebases usually snap. A safer split looks like this:
- Move Node to the minimum supported version for your target Next.js.
- Run the app and tests, and fix only what the Node change broke.
- Then move Node to your preferred LTS within the same support range.
Next.js comes after Node because framework changes (routing, build output, server behavior) are harder to debug when the runtime is also changing. Keeping those diffs separate makes it much clearer what caused a new failure.
There are exceptions. You might upgrade Next.js first if your current Next.js version doesn't support any Node version you can run in production (for example, hosting forces a newer Node), or if a small Next.js patch is required to even start on your current Node. If you do this, keep it to the smallest step possible, then return to the normal order.
Step-by-step: do the upgrade in controlled moves
Change one variable at a time, keep the app buildable, and commit often. That's how you avoid turning a small upgrade into a week of guessing.
First, lock down runtime expectations. Set the Node version you will use (and make it visible in engines). Make sure everyone uses the same package manager and the same lockfile rules. A lot of "upgrade bugs" are just different Node versions or a regenerated lockfile.
A controlled move order that works well on messy repos:
- Update Node (and package manager settings), then commit.
- Delete
node_modules, reinstall cleanly, fix install errors, then commit. - Run a production build, fix build-blockers (types, lint, missing env vars), then commit.
- Upgrade Next.js (and React if required), reinstall, build again, then commit.
- Run locally and replay your baseline flows, then commit.
During reinstalls, treat peer dependency and postinstall errors as signals. If a package breaks on install, fix that first instead of stacking problems.
After every successful build, run the same key flows you wrote down earlier. If your baseline script says "log in, create a record, refresh, confirm it persists," do that after each commit. This is where you catch breaks that only show up at runtime.
Name commits after the change, not the outcome (for example, "Bump Node to 20 and update engines"). If something goes wrong, you can revert one step instead of backing out a whole day.
How to catch runtime-only breaks early
Build-time errors are loud. Runtime errors are quieter and often worse because they show up only after deploy, only for certain users, or only after a redirect.
Don't trust a successful build as proof your app works. After an upgrade, run the app the way production runs it: a production build, realistic environment values, and real cookies.
Fast ways to surface runtime issues
Start by running a production build locally and then starting the server. This catches problems hidden by dev mode, like code that only runs on the server in production, or modules that behave differently once bundled.
Then stress the common runtime-only failure points:
- Environment variables: missing values, renamed keys, or values set only in your hosting provider.
- Dynamic imports and server-only code: Node-only APIs sneaking into the client bundle.
- Hydration issues: HTML that doesn't match what React expects, often caused by
window/localStorageusage too early. - Auth/session flows: cookies, secure flags, callback URLs, redirect rules.
- Runtime differences: edge vs node runtime, body parsing, header handling, relying on request fields that aren't there.
A common scenario: the app builds and the homepage loads, but login loops. The cause is often cookie behavior under HTTPS or a callback URL env var mismatch between environments. You only catch it by testing the full redirect flow end-to-end.
Quick regression checks that save hours
After an upgrade, you don't need to test everything. You need a handful of checks that catch the most common breakpoints fast, especially in an inherited app.
Treat your machine like production: do a full production build, then start the server the same way you do in prod. This is where many "it works in dev" surprises show up.
Do a quick env var pass before blaming the code. Upgrades tend to surface config drift because stricter validation or changed defaults make silent issues loud.
Five smoke checks that usually pay off:
- Load one SSR page and one static page, then refresh both.
- Click through a route that uses redirects or rewrites.
- Hit one API route end-to-end, including auth.
- Trigger middleware behavior (protected routes, locale routing).
- Run one real-world side effect if the app has it (upload, email, webhook).
Watch the terminal and browser console for warnings you can act on. Deprecations and runtime notices often point directly at what's going to break next.
Common traps and how to avoid them
Inherited upgrades get scary when too many things change at once. Keep changes small, and make it easy to point to the exact commit that introduced a break.
Trap 1: Upgrading everything at once
When Node, Next.js, React, ESLint, and a dozen plugins move together, you lose the "why." Keep a simple order, stop after each step, and verify the app still runs.
Trap 2: Different dependency trees on different machines
Lockfiles exist for a reason. If the lockfile is missing, ignored, or constantly changing, developers will install different dependency sets and get different failures.
Pick one package manager, commit the lockfile, do clean installs, and use the same Node version in local, CI, and production.
Trap 3: "Fixing" errors by random pinning
Pinning a package until the error goes away can hide the real issue and make the project more fragile.
Before pinning, figure out whether the error is from a breaking change, a peer dependency mismatch, or a build tool difference. If you must pin, write down why and plan to remove it.
Trap 4: Only testing dev mode
Next.js dev mode can mask problems that appear in production. Always run a production build and start it locally.
Trap 5: Secrets and config drift
Inherited projects often have messy env files and hardcoded keys. Framework upgrades can change env handling and break auth, storage, or third-party APIs.
Do a quick sanity check: list required environment variables, confirm scopes and permissions, and make sure nothing sensitive is committed.
A simple upgrade checklist (printable)
Tape this next to your monitor. The goal is to catch the failures that turn a small version bump into a weekend of guessing.
Run these checks after each controlled change (after the Node bump, then after the Next.js bump). If you wait until the end, you lose the clue of which step caused the break.
- Clean install and boot: delete dependencies, install from scratch, and start the app with one command.
- Production build is explainable: the build finishes, and new warnings are ones you understand.
- Top 5 user flows work with realistic data: use real data or a demo dataset that behaves like production.
- Auth survives real usage: sign in and sign out work after refresh, in a new tab, and after closing and reopening the browser.
- Basic security sanity check: no secrets committed, and no obvious injection holes in changed code paths.
If one item fails, don't keep upgrading. Fix forward in the smallest step you can.
If you need to roll back, go to the last passing commit and re-apply changes one at a time. Compare config and env usage (Node version, runtime, build flags). Reduce scope by disabling optional features until core flows pass. Write one small regression note so retesting stays fast.
Example: upgrading a shaky prototype without breaking production
A founder hands you an AI-generated Next.js prototype. It worked in demos, but the first real deploy fails: the server crashes on startup, auth redirects loop, and a few pages show blank screens only after you click around.
The starting point looks familiar: an older Node version, an older Next.js version, a fragile auth setup copied from snippets, and a long dependency list that was never curated. The code runs in development, but the production build is a different story.
You keep the order small and predictable. First you move Node to a supported LTS version and get the project building again with zero other changes. Only then do you upgrade Next.js. After that, you update only the dependencies that broke because of the framework change.
A practical sequence:
- Step 1: Upgrade Node, reinstall dependencies cleanly, confirm the existing Next.js version still builds.
- Step 2: Upgrade Next.js (and React if required), then fix only the errors that block build or start.
- Step 3: Apply targeted dependency updates (auth library, fetch client, ORM) based on real failures.
Before calling it done, you run a few quick regression checks that catch runtime-only breaks:
- Production build and start (not just dev server).
- Full auth flow (sign in, refresh, sign out).
- One API route end-to-end (request, validation, response).
- One data-heavy page (load, paginate, error state).
The outcome is fewer unknowns: a stable build, a working deploy, and a short, clear list of remaining issues to fix next.
Next steps if the upgrade still feels unstable
Sometimes the upgrade isn't the real problem. It's the inherited codebase. If you're seeing new errors every time you fix one, pause. Pushing harder can turn a messy upgrade into a broken release.
Stop and get help if these keep happening:
- Authentication breaks more than once (sessions, cookies, redirects, middleware).
- You suspect security issues (exposed secrets, unsafe input, odd database queries).
- Errors only happen in production and you can't reproduce them locally.
- Stack traces point to generated code you can't understand or trust.
- You can't explain what changed between a working and failing build.
If you hand it off, you can save hours by sending a clean bundle of context so someone can start testing quickly:
- Repo access (or a zip) plus the exact branch/commit you want upgraded.
- Error logs (build output, server logs, browser console output).
- The regression script you used for your baseline run.
- Deployment details (hosting, env vars handling, Node version, build command).
- Target versions (Node and Next.js) and any deadlines.
If the project started as an AI-generated prototype and you're running into brittle auth, exposed secrets, or tangled routing, FixMyMess (fixmymess.ai) can start with a free code audit to pinpoint what's blocking a safe upgrade, then repair and harden the codebase with human-verified fixes.
FAQ
Why do Next.js upgrades feel so risky on inherited projects?
Treat it as risky because you don’t know which “working” behaviors are accidental. Start by writing down the current Node/Next.js versions, where the app runs (local, CI, prod), and the 3–5 flows that must not break, then only change one variable at a time.
What’s the fastest way to create a baseline before upgrading?
Do a clean install, run a production build, start the server, and manually replay your key flows. Save the build and start logs so you can compare warnings and runtime errors after each change.
Should I upgrade Node or Next.js first?
Default to upgrading Node first to a version your target Next.js supports, verify everything still builds and boots, then upgrade Next.js. Keeping runtime and framework changes separate makes failures much easier to trace and revert.
When does it make sense to upgrade Next.js first?
When your hosting forces a Node version that your current Next.js doesn’t support, you may need a small Next.js step first just to run anywhere. Keep it minimal, get back to a stable booting state, then return to the normal order (Node alignment, then Next.js).
Why does everything work in dev but break after deploy?
Dev mode hides issues that show up only in production builds, especially around server code, bundling, and runtime defaults. Always test using a production build and a local start command with realistic environment variables and cookies.
What are the most common runtime-only failures after an upgrade?
Login loops and cookie issues are most common, followed by missing environment variables and runtime differences (edge vs node, proxy headers). Run the full auth redirect flow end-to-end under HTTPS-like settings and confirm callback URLs, cookie flags, and trusted domains are correct.
What smoke tests catch the most breakages quickly?
After each controlled change, verify one SSR page and one static page, refresh both, and complete one core “money” action end-to-end. If API routes, middleware, uploads, email, or webhooks exist, trigger one real request so you catch failures that don’t appear on page load.
How do I stop different machines from producing different upgrade results?
Pick one package manager, commit and respect the lockfile, and keep Node versions consistent across local, CI, and production. Many “upgrade bugs” are actually different dependency trees or different runtimes producing different installs and behavior.
Is it okay to ‘fix’ upgrade errors by pinning random packages?
Pinning can get you unstuck, but it often hides the root cause and makes the project more fragile later. If you must pin, do it deliberately with a note explaining why, and plan a follow-up step to remove the pin once the real incompatibility is fixed.
When should I stop and ask for help instead of pushing through?
Stop when you can’t reproduce production failures locally, auth keeps breaking, or you suspect security issues like exposed secrets or unsafe input handling. FixMyMess can start with a free code audit, then repair and harden the AI-generated or inherited code with human-verified changes so the upgrade becomes predictable.